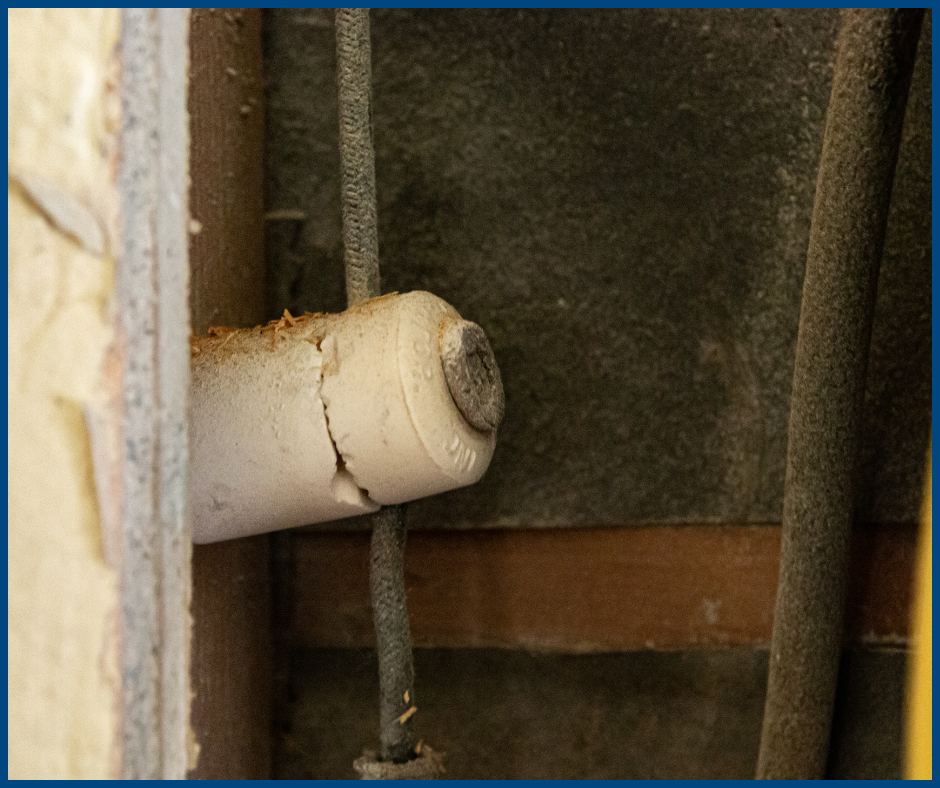
Uncommon Ways Your Home Could Be Signaling Plumbing Issues
Plumbing issues aren’t always as straightforward as a dripping faucet or a clogged drain. Sometimes, problems can manifest in more unexpected ways, leaving homeowners unsure of where to turn. Here are some unconventional ways your home might be signaling that it’s time to address plumbing problems.
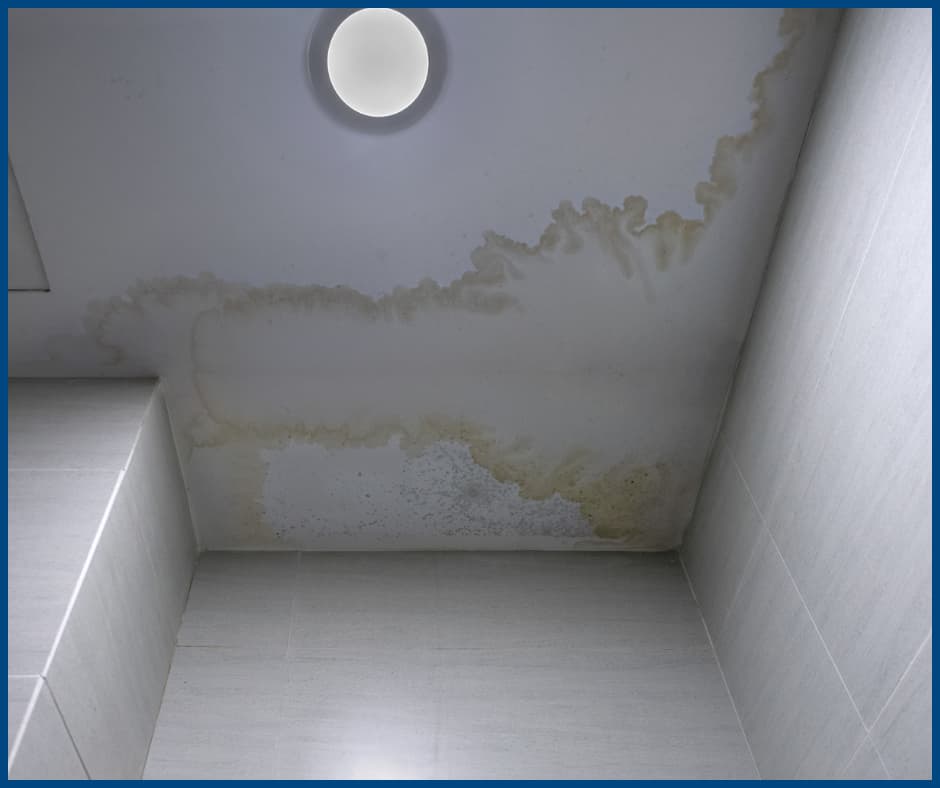
Water Stains on Walls or Ceilings
If you notice unexplained water stains or discoloration on your walls or ceilings, it could indicate a plumbing issue lurking behind the surfaces. Leaks from pipes in the walls or ceiling can cause water damage that spreads quietly over time. These stains may seem minor at first, but ignoring them could result in more serious structural problems if the leak continues.
Odd Smells Around the House
Unpleasant odors coming from your drains, toilets, or walls can be a sign of plumbing trouble. A foul sewer smell could indicate a problem with the sewer line or a blocked vent pipe, while sulfurous odors may suggest bacteria in your water supply. If the smell lingers, it’s a good idea to have your plumbing inspected to avoid further complications.
Fluctuating Water Pressure
Inconsistent water pressure, whether it’s unusually low or suddenly too high, might be a symptom of plumbing issues. Low pressure could be the result of a leak somewhere in your system or mineral buildup inside your pipes. On the other hand, fluctuating high pressure can lead to damage to your fixtures, appliances, and even your pipes. Either way, it’s a problem worth addressing.
A Spike in Your Water Bill
If your water bill jumps unexpectedly, it could be a sign that there’s a plumbing issue at play, even if you haven’t used more water than usual. A slow leak somewhere in your pipes can waste a significant amount of water over time, leading to higher-than-expected bills. It’s important to have your plumbing checked if you notice this.
Gurgling or Bubbling Noises
If you hear gurgling or bubbling sounds coming from your sink, toilet, or drains, it might be a sign of a blockage in your pipes or an issue with the venting system. These noises occur when air is trapped in the pipes, and if not addressed, they can lead to more severe clogs or even backups.
Soft or Wet Areas in Your Yard
If your yard feels unusually wet or soft, especially in areas away from your usual water sources, it could indicate a leak in your underground plumbing. Leaking pipes can saturate the ground and create persistent wet spots, which might lead to further issues like foundation damage. Don’t ignore these signs—catching them early can prevent costly repairs later.
Slow Draining in Multiple Fixtures
When multiple fixtures in your home start draining slowly at the same time, it could indicate a larger issue, such as a blockage in the main sewer line. Rather than dealing with individual drain issues, a widespread draining problem suggests that something is blocking the flow at a more central point in your plumbing system.
Conclusion
Plumbing problems don’t always announce themselves in the obvious ways. If your home is showing any of these unusual signs, it’s a good idea to have a professional plumber take a look. Identifying plumbing issues early can save you from costly repairs and prevent damage to your home in the long run.
Hidden Dangers: Where Mold Can Hide Inside Your Home
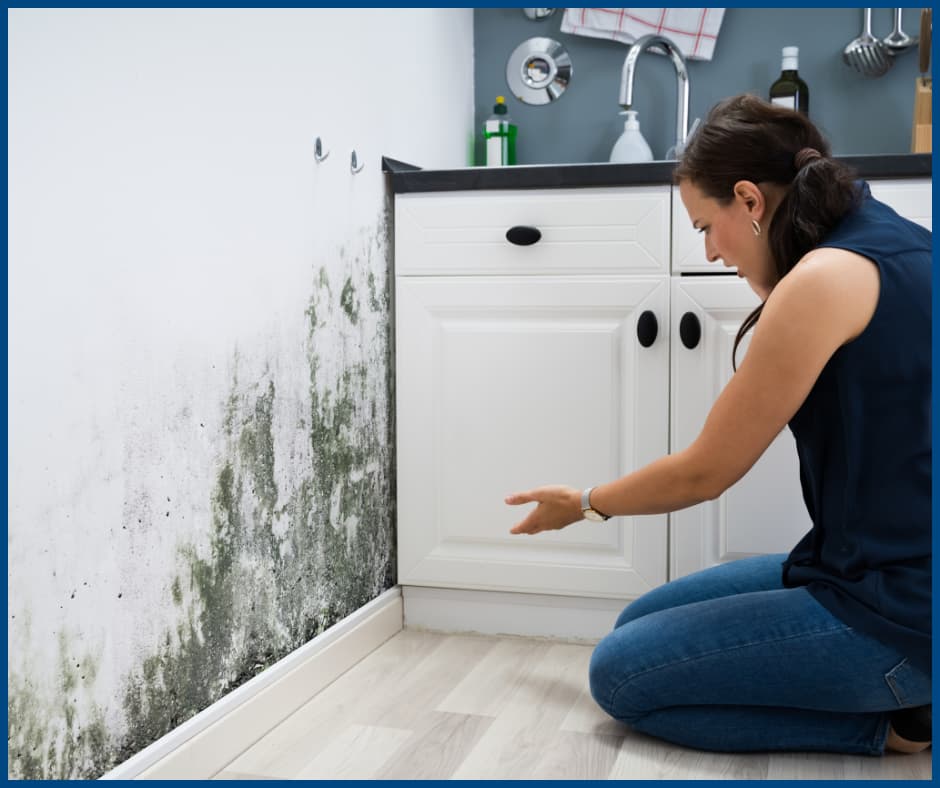
Mold is a sneaky invader that thrives in dark, damp, and undisturbed areas of your home. While visible mold is easy to spot, hidden mold can go unnoticed until it becomes a significant problem. Knowing where mold likes to hide can help you take preventive action and keep your home healthy.
Here are seven places mold might be hiding in your home:
1. Behind Walls and Wallpaper
Mold loves to lurk in areas that stay damp for long periods, such as behind walls with plumbing leaks or wallpaper exposed to moisture. Wallpaper glue is an especially appealing food source for mold spores, making this an ideal hiding spot.
2. Under Carpets and Padding
When spills or leaks seep into carpets, the moisture can become trapped in the fibers and padding below. Over time, this creates the perfect environment for mold to grow unnoticed until odors or stains reveal its presence.
3. Inside HVAC Systems
Heating, ventilation, and air conditioning systems are common mold hotspots. Condensation from temperature changes and accumulated dust provide mold with all it needs to thrive. Regular cleaning and maintenance of your HVAC system can help prevent this issue.
4. Behind Appliances
Large appliances like refrigerators, washing machines, and dishwashers often hide mold growth due to the moisture they generate. Check behind these appliances periodically to ensure no water is pooling or creating damp conditions.
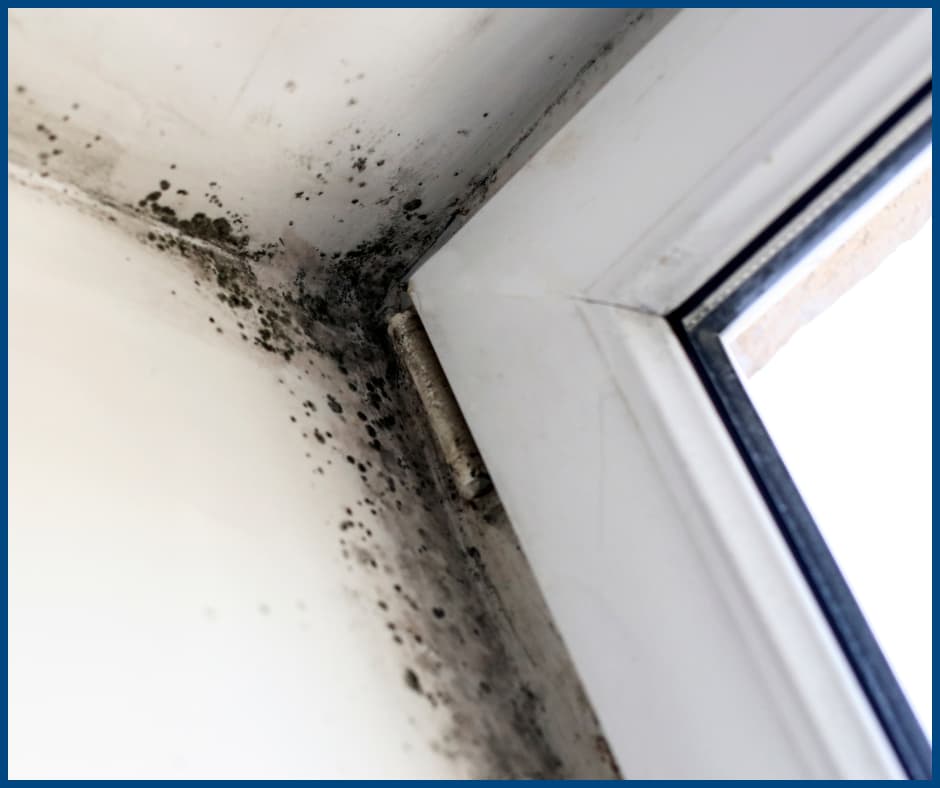
5. In Window Frames
Condensation on windows can lead to moisture buildup around the frames. Wooden and metal frames are particularly susceptible, providing mold with both moisture and a suitable surface to grow.
6. Under Sinks
Leaky pipes or poorly sealed areas under your kitchen and bathroom sinks are mold magnets. The enclosed space makes it easy for mold to grow unnoticed until it spreads or begins to emit a musty odor.
7. In Attics and Crawlspaces
Attics and crawlspaces are often poorly ventilated, making them prime locations for hidden mold. Roof leaks or condensation from poor insulation can provide enough moisture for mold to establish itself in these out-of-sight areas.
Tips for Preventing Mold Growth
- Control Humidity: Use a dehumidifier or air conditioner to keep indoor humidity levels below 60%.
- Fix Leaks Immediately: Address plumbing and roof leaks as soon as they are discovered.
- Improve Ventilation: Ensure good airflow in your home, especially in areas prone to dampness, like bathrooms and kitchens.
- Inspect Regularly: Periodically check hidden spaces like under sinks, behind appliances, and in your attic for signs of mold or water damage.
Mold can be harmful to your health and the structural integrity of your home. Spotting it early or preventing it altogether will save you from costly repairs and health concerns.
If you’re unsure about potential mold growth, a professional home inspection can identify problem areas before they escalate. For peace of mind and a healthier home, reach out to AmeriSpec Inspection Services. Visit www.amsde.net to schedule your inspection today!
Breathing New Life Into Furniture: Your Guide to Refinishing
There’s something magical about taking an old, worn piece of furniture and transforming it into a statement piece for your home. Refinishing furniture isn’t just a practical way to save money—it’s an opportunity to express your style and creativity. If you’ve been curious about tackling a refinishing project, here’s how to get started.
The Beauty of Refinishing
Refinishing furniture allows you to preserve craftsmanship and history while making the piece your own. Whether it’s a vintage desk, a weathered coffee table, or an antique chair, the process can reveal hidden beauty and add character to your space.
How to Refinish Like a Pro
Step 1: Evaluate Your Piece
Start by examining the furniture to determine if it’s worth refinishing. Solid wood is ideal, as it can withstand sanding and staining. Be mindful of structural damage, as repairs might require extra work.
Step 2: Prepare Your Workspace
Set up a well-ventilated area with plenty of light. Cover surfaces to protect them from dust and spills. Having everything organized—sandpaper, paint, brushes, stain, and protective coatings—will make the process smoother.
Step 3: Strip the Old Finish
Removing the old paint or varnish is essential for a fresh start. Use sandpaper or a chemical stripper, depending on the piece’s complexity. Sand in the direction of the wood grain for a smooth result.
Step 4: Repair and Prep
Check for imperfections, such as dents or cracks. Fill them with wood filler and sand again once dry. If you’re painting, use a primer to create an even surface and improve the final result.
Step 5: Add Color
Apply a stain to enhance the wood’s natural beauty or choose a bold paint color for a contemporary look. Use thin, even coats, allowing each layer to dry thoroughly.
Step 6: Seal the Deal
Protect your work with a topcoat. Polyurethane adds durability and shine, while wax creates a softer, vintage finish. Choose what suits your style and the furniture’s intended use.
Why Refinishing Is Worth It
Refinishing furniture is an eco-friendly way to furnish your home while preserving the charm of older pieces. It’s a chance to craft something unique, telling a story through every brushstroke and detail.
Take the Leap
The next time you see a tired dresser at a flea market or an old table collecting dust in your garage, don’t dismiss it. With a little effort and creativity, you can turn that piece into a stunning addition to your home.
Refinishing is more than a project—it’s a celebration of artistry and renewal. Ready to start your own? Let your imagination guide you, and watch as your furniture transforms before your eyes.
Knob and Tube Wiring: What Homeowners Need to Know
Knob and tube wiring is a relic of the past that still lingers in many older homes today. While it was a technological marvel when introduced in the late 1800s, this outdated electrical system now presents significant challenges for modern homeowners. Understanding the potential risks and limitations of knob and tube wiring is essential for anyone living in or considering purchasing an older property.
What Is Knob and Tube Wiring?
Knob and tube wiring was one of the first standardized electrical wiring systems used in residential construction. It features copper wires insulated with a cloth covering, held in place by ceramic knobs and tubes. This setup was sufficient for homes built in the early 20th century, where the electrical load was minimal and limited to a few basic appliances like lights and radios.
However, homes today require far more electricity, and the safety standards for electrical systems have significantly evolved since then.
Why Is Knob & Tube a Problem?
1. Increased Fire Risk
Knob and tube wiring was never designed to handle the electrical demands of modern appliances. Overloading these circuits can lead to overheating, which increases the risk of electrical fires. The cloth insulation also deteriorates over time, further compounding the fire hazard.
2. Lack of a Ground Wire
Modern electrical systems include a ground wire to reduce the risk of electrical shock and protect against power surges. Knob and tube lacks this essential safety feature, leaving homes vulnerable to electrical accidents.
3. Insurance Challenges
Many insurance companies refuse to cover homes with active knob and tube wiring due to its outdated nature and associated risks. Those that do provide coverage may charge significantly higher premiums. This can create additional costs and complications for homeowners.
4. Improper Modifications Over Time
In many older homes, knob and tube wiring has been tampered with or patched into modern systems by unqualified individuals. These modifications can create unsafe conditions, as they often fail to meet current electrical codes.
What Should Homeowners Do?
If your home still has knob and tube, it’s essential to take proactive steps:
- Schedule a Professional Inspection: A certified electrician or home inspector can assess the condition of the wiring and determine if it poses an immediate safety risk.
- Plan for Replacement: Upgrading to a modern electrical system ensures your home meets today’s safety standards and can handle the demands of contemporary appliances.
- Understand the Costs: Replacing knob and tube is a significant investment, but it’s one that enhances your home’s safety and value.
Comprehensive Inspections by AmeriSpec
At AmeriSpec Inspection Services, we specialize in thorough home inspections that uncover potential risks, including outdated electrical systems like knob and tube wiring. With over 59,000 inspections completed since 1995, our certified inspectors provide detailed reports that help you make informed decisions about your property.
Our inspections cover more than 400 aspects of your home, including electrical systems, structural components, and more. We also include high-quality digital photos and offer unique tools like HomeBinder for ongoing home management.
If you’re concerned or need a full home inspection, schedule with AmeriSpec today. Visit our website at www.amsde.net to learn more or book your inspection.
Outdated systems like knob and tube wiring don’t belong in today’s homes. Addressing these issues now helps protect your home, your family, and your investment in the future.
